Showing posts with label recipe. Show all posts

Saturday, 25 May 2013

Cubanelle Pepper Pesto


I recently took a trip to the grocery store with the intent to buy some things that I just cannot remember at this moment. However, I did come across these lovely peppers that I have never tried before. It just screamed pesto, to me.


They were cubanelle peppers which is a variety of sweet (mild) peppers, similar in taste and texture to bell peppers. However, its walls are slightly thinner than the bell peppers which makes for faster cooking. I roasted these peppers in the toaster over for a short time, then made the pesto, and tossed it with some pasta. Pasta is definitely one of my favourite ways to eat pesto.
I also used some basil in this pesto, but not enough to overpower the peppers. Using little is important since basil has a very strong flavour while these peppers are quite mild.


Sweet Pepper (Cubanelle/Bell) Pesto

Ingredients:

  • Two large Peppers (about 250g in total)
  • 1 C. loosely packed Basil
  • 2 medium-large cloves Garlic
  • 1/8 C. favourite Nut, toasted (optional)
  • 1 oz. Parmesan Cheese
  • Sea Salt and Black Pepper, to taste
  • Olive Oil
Method:
  1. Roast the pepper on medium heat in the oven until soft and slightly charred.
  2. Remove stems and seeds of the peppers and slice into a couple of pieces.
  3. In a food processor or blender (I used the Magic Bullet), pulse garlic with a few drops of oil until it is a fine paste.
  4. Add peppers, basil, nuts, a little salt and pepper, and parmesan. Drizzle olive oil as you blend mixture into a smooth paste/sauce. 
  5. Adjust seasonings to taste.

I used this pesto in a light but tasty pasta dish. I sauteed some polish sausage slices in a little butter, added some farfalle and the pesto, and topped it off with some tiny feta cubes. If serving the pesto with feta, remember it's a salty cheese, so use salt sparingly in the pesto.


It was quite good. Light and clean tasting, but still filling.

Sunday, 19 May 2013

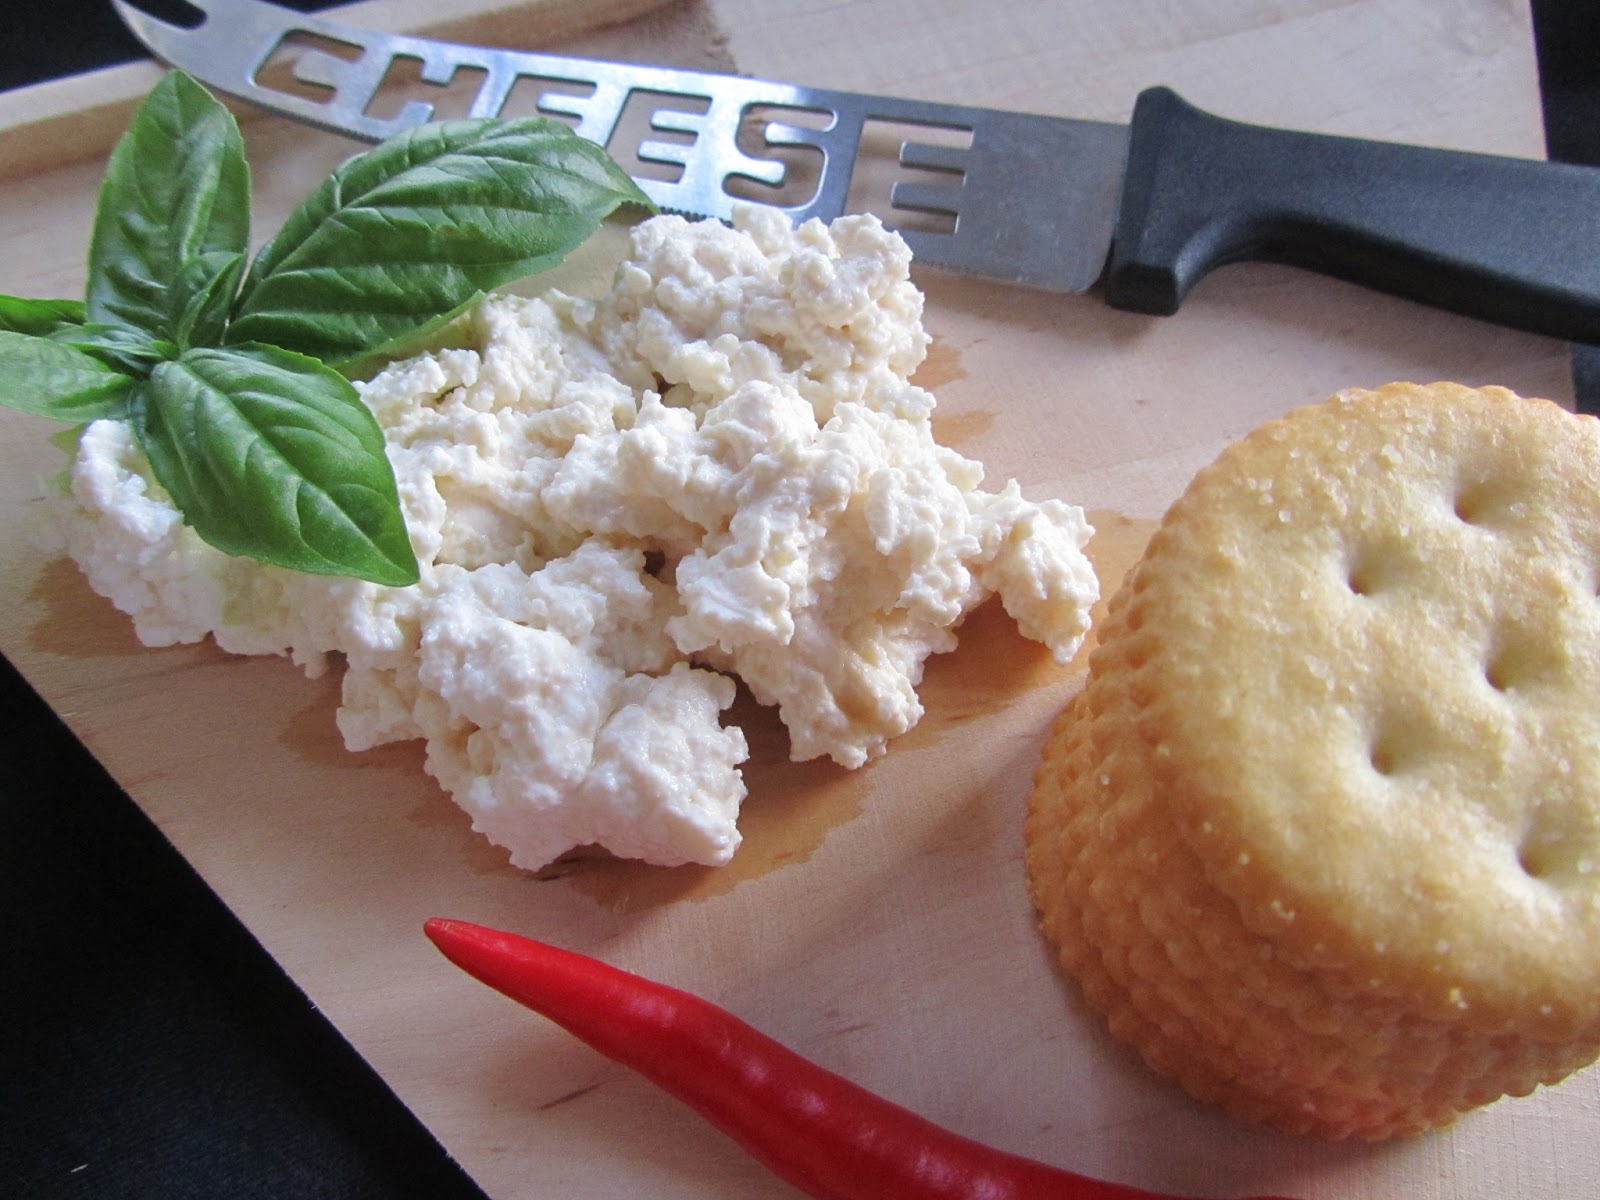
Homemade Ricotta


A good friend of mine celebrated her birthday this month. Sometimes shopping for people or deciding what to give them as a present, is quite difficult. But everyone eats. And almost everyone finds great joy out of doing just that. Acknowledging that fact as well as my love for food, the only appropriate thing to do was cook her a meal. She has had a slight craving for Baked Ziti recently. I have never eaten nor made that dish before, but I decided to try for her anyway. I also baked a carrot cake with coconut cream cheese frosting and some shortbread cookies. I'll talk about those later on.
For the Ziti, since I had an exam, I made it shortcut. I used a canned tomato sauce, a few fresh herbs, some mushrooms and three types of cheeses (New Zealand cheddar which is most common in Trinidad, Parmesan and Ricotta). However, I did make the ricotta from scratch... sort of a personal touch.
It's actually surprising how simple it is to make ricotta. It's obviously not the sheep's milk whey type of ricotta, but it tastes great, and it's not full of chemicals or preservatives. It's a whole milk homemade variety using cow's milk. Traditional ricotta uses the leftover whey from making other cheeses. However, this type uses the actual curds gathered and the whey is leftover.


Homemade (Whole Milk) Ricotta

Ingredients:

  • 1 Liter (32oz./4 cups) Milk
  • 2 Tbsp Distilled White Vinegar/Lime Juice
  • (optional) 1/2 Cup Heavy Cream
  • 1 Tsp. Salt
Method:
  1. In a medium pot/saucepan, heat the milk (and heavy cream, if using) on medium low heat, stirring occasionally to avoid scalding the milk. If the milk scalds, the ricotta would have a burnt smell that isn't very pleasant.
  2. JUST before the boil, remove milk from heat and stir in salt. It is important to heat the milk enough so that it curdles properly but not too much that it scalds. It's not as complicated as it sounds. However, if you want to be exact and use a thermometer, 180ยบ F is about what you're looking for.
  3. Allow to sit for 10 minutes to an hour. 
  4. Line a colander/strainer with cheesecloth or some fine-meshed cloth and remove curds from liquid with a slotted spoon. Leave the liquids to drain for 30-minutes up to a few hours, depending on how dry you want it. To speed up the process and to get a firmer cheese, gently squeeze the liquid occasionally. 
  5. Store cheese in the refrigerator and use within the week. 

Hopefully she enjoyed the meal, and I'll definitely be making some more soon to make homemade ravioli. This recipe can easily be doubled or tripled depending on how much cheese you need/want. 

Monday, 21 January 2013

Old Fashioned Pancakes

Nostalgia. =)
This is what a pancake is supposed to taste like. Soft, light, fluffy, subtly sweet... delicious!


After a lot of trial and error, I created an easy and yummy pancake that works for me. And it doesn't take much more time to put together than those pre-mixes which, trust me, fail in comparison. There's nothing like warm homemade pancakes, piled high, for a lovely weekend breakfast. This recipe is so fast and easy however, it's ideal for even busy weekdays. Or anytime you feel like it... there's no wrong time for breakfast is there?

Good Old Fashioned Pancakes
(yields 8 units)

Ingredients:
  • 2 Tbsp Butter, melted and cooled slightly
  • 1 Cup All-purpose Flour
  • 2 Tbsp Sugar
  • 1 Tsp Baking Powder
  • 1/2 Tsp Baking Soda
  • Pinch of Salt
  • 3/4 Cup Whole Milk (or Buttermilk)
  • 1 Large Egg
  • (optional) 1 Tsp Vanilla Extract
  • (optional) 1 Tsp Cinnamon Powder
Method:
  1. In a large bowl, sift together the flour, baking powder and soda, salt, and sugar.Make a well in the center and pour in the milk, egg and melted butter. Whisk until smooth.
  2. Heat a frying pan over medium heat. Pour approximately 1/4 cup batter into the pan for each pancake. Cook until small air bubbles form, flip, and brown on the other side for a minute more.
  3. Enjoy hot with butter or your favourite syrup.
This is a basic recipe which can easily be adjusted for add-ins such as fruit or chocolate, or using whole wheat and dairy/egg replacers.

Saturday, 2 June 2012

Butter Chicken

Let's take a trip to India with Murgh Makhani! (Photos coming VERY soon!)
Butter Chicken is something I expected to be very difficult to make but it was surprisingly easy and surpassed my expectations in taste. It's probably one of the best curries that I have ever tried, and I was very pleased with the results. Of course, we ate it with homemade naan, which was equally as simple and delicious. Next time, I'll also make a simple biryani to go with it. I did a little research and used that as my guide to this recipe, using the same basic ingredients but making it personal.
Butter chicken (or murgh makhani) is part of the Mughlai cuisine, popular in countries all over the world. The cuisine is strongly influenced by Persian, and Turkic cuisines of Central Asia. The dish became a common name across the world by the Sikh diaspora from Punjab. The origins of butter chicken can be traced back to a man named Kundan Lal Gujral, who ran a restaurant called Moti Mahal Delux in Peshawar before the partition of British India. With the partition of British India, Moti Mahal moved to New Delhi. Butter Chicken is regarded to have been first introduced by Moti Mahal in New Delhi. Butter chicken is usually served with naan, roti, parathas or steamed rice. It should not be confused with Chicken tikka masala, a similarly coloured Indian chicken dish that originated among the South Asian diaspora in the U.K..
Murgh Makhani/Butter Chicken
(Serves 4)

Marinade/Seasonings:

  • 1½ lbs. chicken
  • Chadon beni/Cilantro
  • Chive
  • Thyme
  • Parsley
  • Small onion
  • Garlic (about 3 cloves)
  • 3 tbsp. garam masala/amchar masala
  • ½ c. plain yoghurt/sour cream (optional)
  • Salt and Black Pepper
Ingredients:
  • 1 140z. can tomato sauce
  • ½ c. plus 2 tbsp. cream 
  • 3 tbsp. garam masala/amchar masala
  • 2 tbsp. curry powder
  • 2 tbsp. roasted geera (cumin)
  • 1 tbsp. methi/fenugreek seeds
  • 1 tbsp. all spice
  • 1 tsp. saffron
  • 1 tbsp. ginger
  • 1 tbsp. garlic
  • 1 tbsp. chili flakes
  • 1 pimento/green chili
  • 2 tbsp. butter
  • 1 10oz. can peas and carrots (optional)
  • Salt and Pepper
  • 2 tbsp. mustard oil
Method:
  1. Cut chicken into small 2" pieces. I used bone in, skin on chicken, thighs and breast pieces mix.
  2. Chop onions, chadon beni, chive, parsley, thyme and garlic. Add to chicken. Season with salt and pepper to taste.
  3. Add masala and yoghurt. Mix thoroughly and refrigerate for a couple of hours or overnight. I skipped the refrigeration and it was still superb.
  4. When ready to cook, heat oil in a skillet (or saucepan, to use just one) and add chicken. Cook chicken on both sides for a few minutes until browned and cooked through.
  5. Remove chicken from pan and set aside.
  6. Combine masala, curry, geera, methi and all spice in small bowl. Grate ginger and garlic, and mince pimento/chili. 
  7. Add 1 tbsp. of oil (optional) to the pan and lightly saute the chili flakes, pimento, ginger and garlic. 
  8. Pour  ½ c. of water into the pan. Stir briefly, scraping the bits from the bottom of the pan.
  9. Add spice mixture and stir briefly.
  10. Pour tomato sauce and  ½ c. cream to the pan. Season with salt and pepper. Stir and cover. Allow sauce to simmer and thicken for a few minutes. 
  11. Remove cover and add butter to sauce. Add chicken back to the pan, along with the tin of peas, if using. Cover and simmer for another couple of minutes.
  12. Remove cover, season with additional salt and pepper if necessary, and remove from heat. Stir in remaining cream, and serve!

I must admit that this was one meal that I was extremely satisfied with. Served with butter-chive naan, it was perfect. The naan is wonderful for all the gravy that comes with butter chicken, which in my opinion, is the best part. Of course, the measurements are not necessarily exact, and can be adjusted based on different tastes. Use your discretion and enjoy! Who knew it was so easy to make butter chicken at home?!